Consent Management (Production)
This is the Consent setup for the production environment. With the approved Consent, real transactions can be initiated!
This step is ONLY required for the Payment API and Balance API.
EAM, Payment Request and Online Payment Page do not have a Consent management process.
What is a Consent?
A Consent (consent request) is an authorization mechanism. Consent creation is done either via API or the Raiffeisen Pay Portal, but approval can only be done manually on the Raiffeisen Pay Portal.
Consent statuses:
IN_PROGRESSAPPROVEDDECLINEDREVOKED
Consent Creation via API
Creation process
Consent creation can be done via API call. Consents created this way have IN_PROGRESS status and are not yet suitable for submitting payments or querying information. The Approver must still authorize their use.
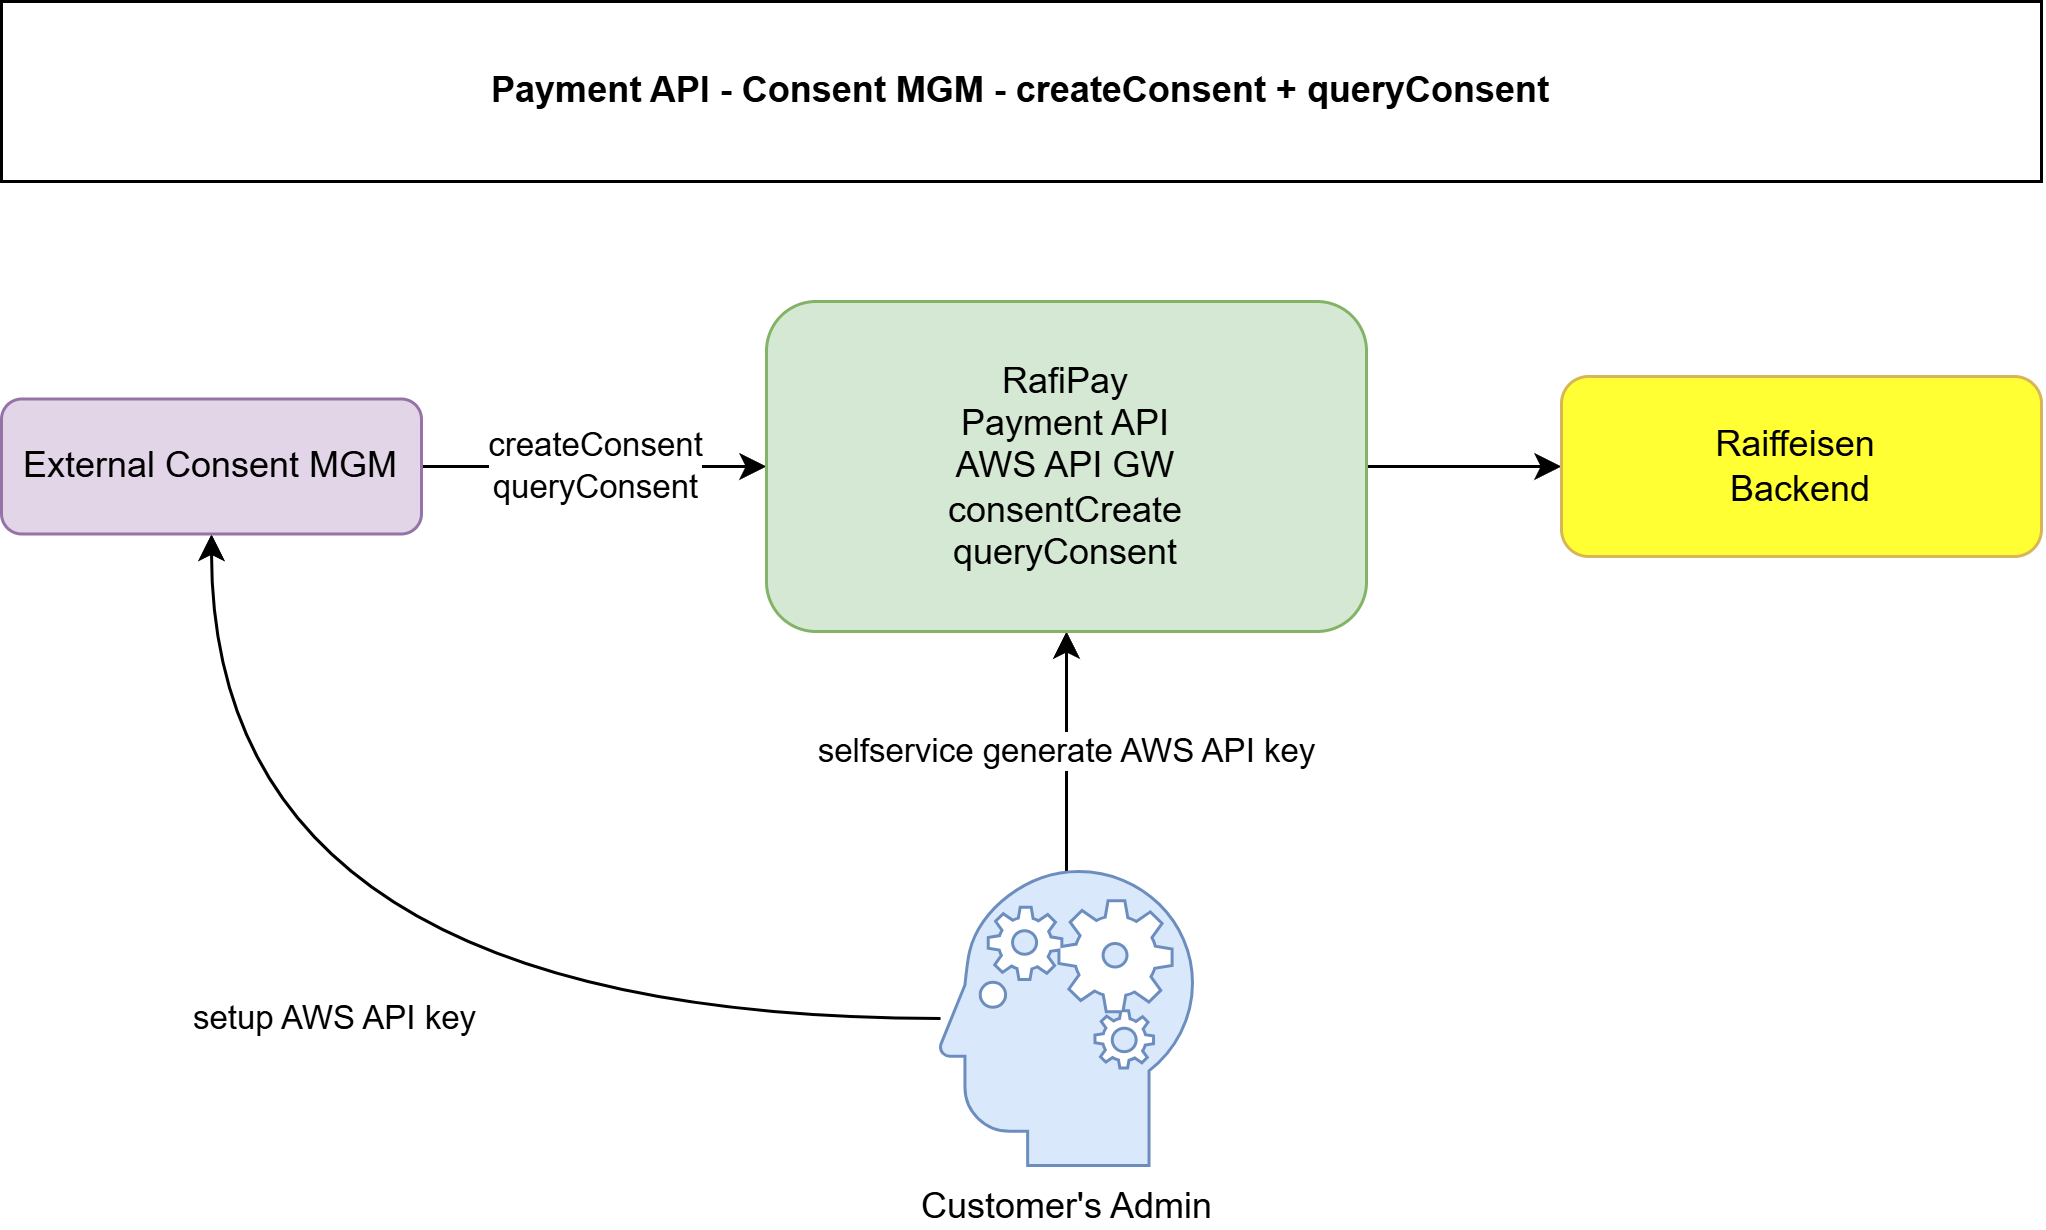
API call details
Endpoint:
POST https://premium-api.raiffeisen.hu/v1/consent/create
The production environment URL is: https://premium-api.raiffeisen.hu (NO -pc suffix!)
What must be provided when creating a Consent?
- Approver's DirektNet identifier (production user) - NOT required
- Expiry date (validity period)
- Real account numbers for which the Approver has signing authorization
In the production environment, real bank accounts must be provided! Every transaction will appear on these accounts.
Response: If the bank accepted the Consent, it returns the Consent ID in the response. This ID must be used in the approval process and when initiating payments and querying information.
Store the Consent ID securely (database, secrets manager). You will need it for every Payment API and Balance API call.
Consent Creation via RPP Portal
Creation process
The Consent can also be created via RPP Portal with either role (Approver or System Administrator). The created Consents are in IN_PROGRESS status and are not yet eligible for payment submission. The Approver must still authorize their usability.
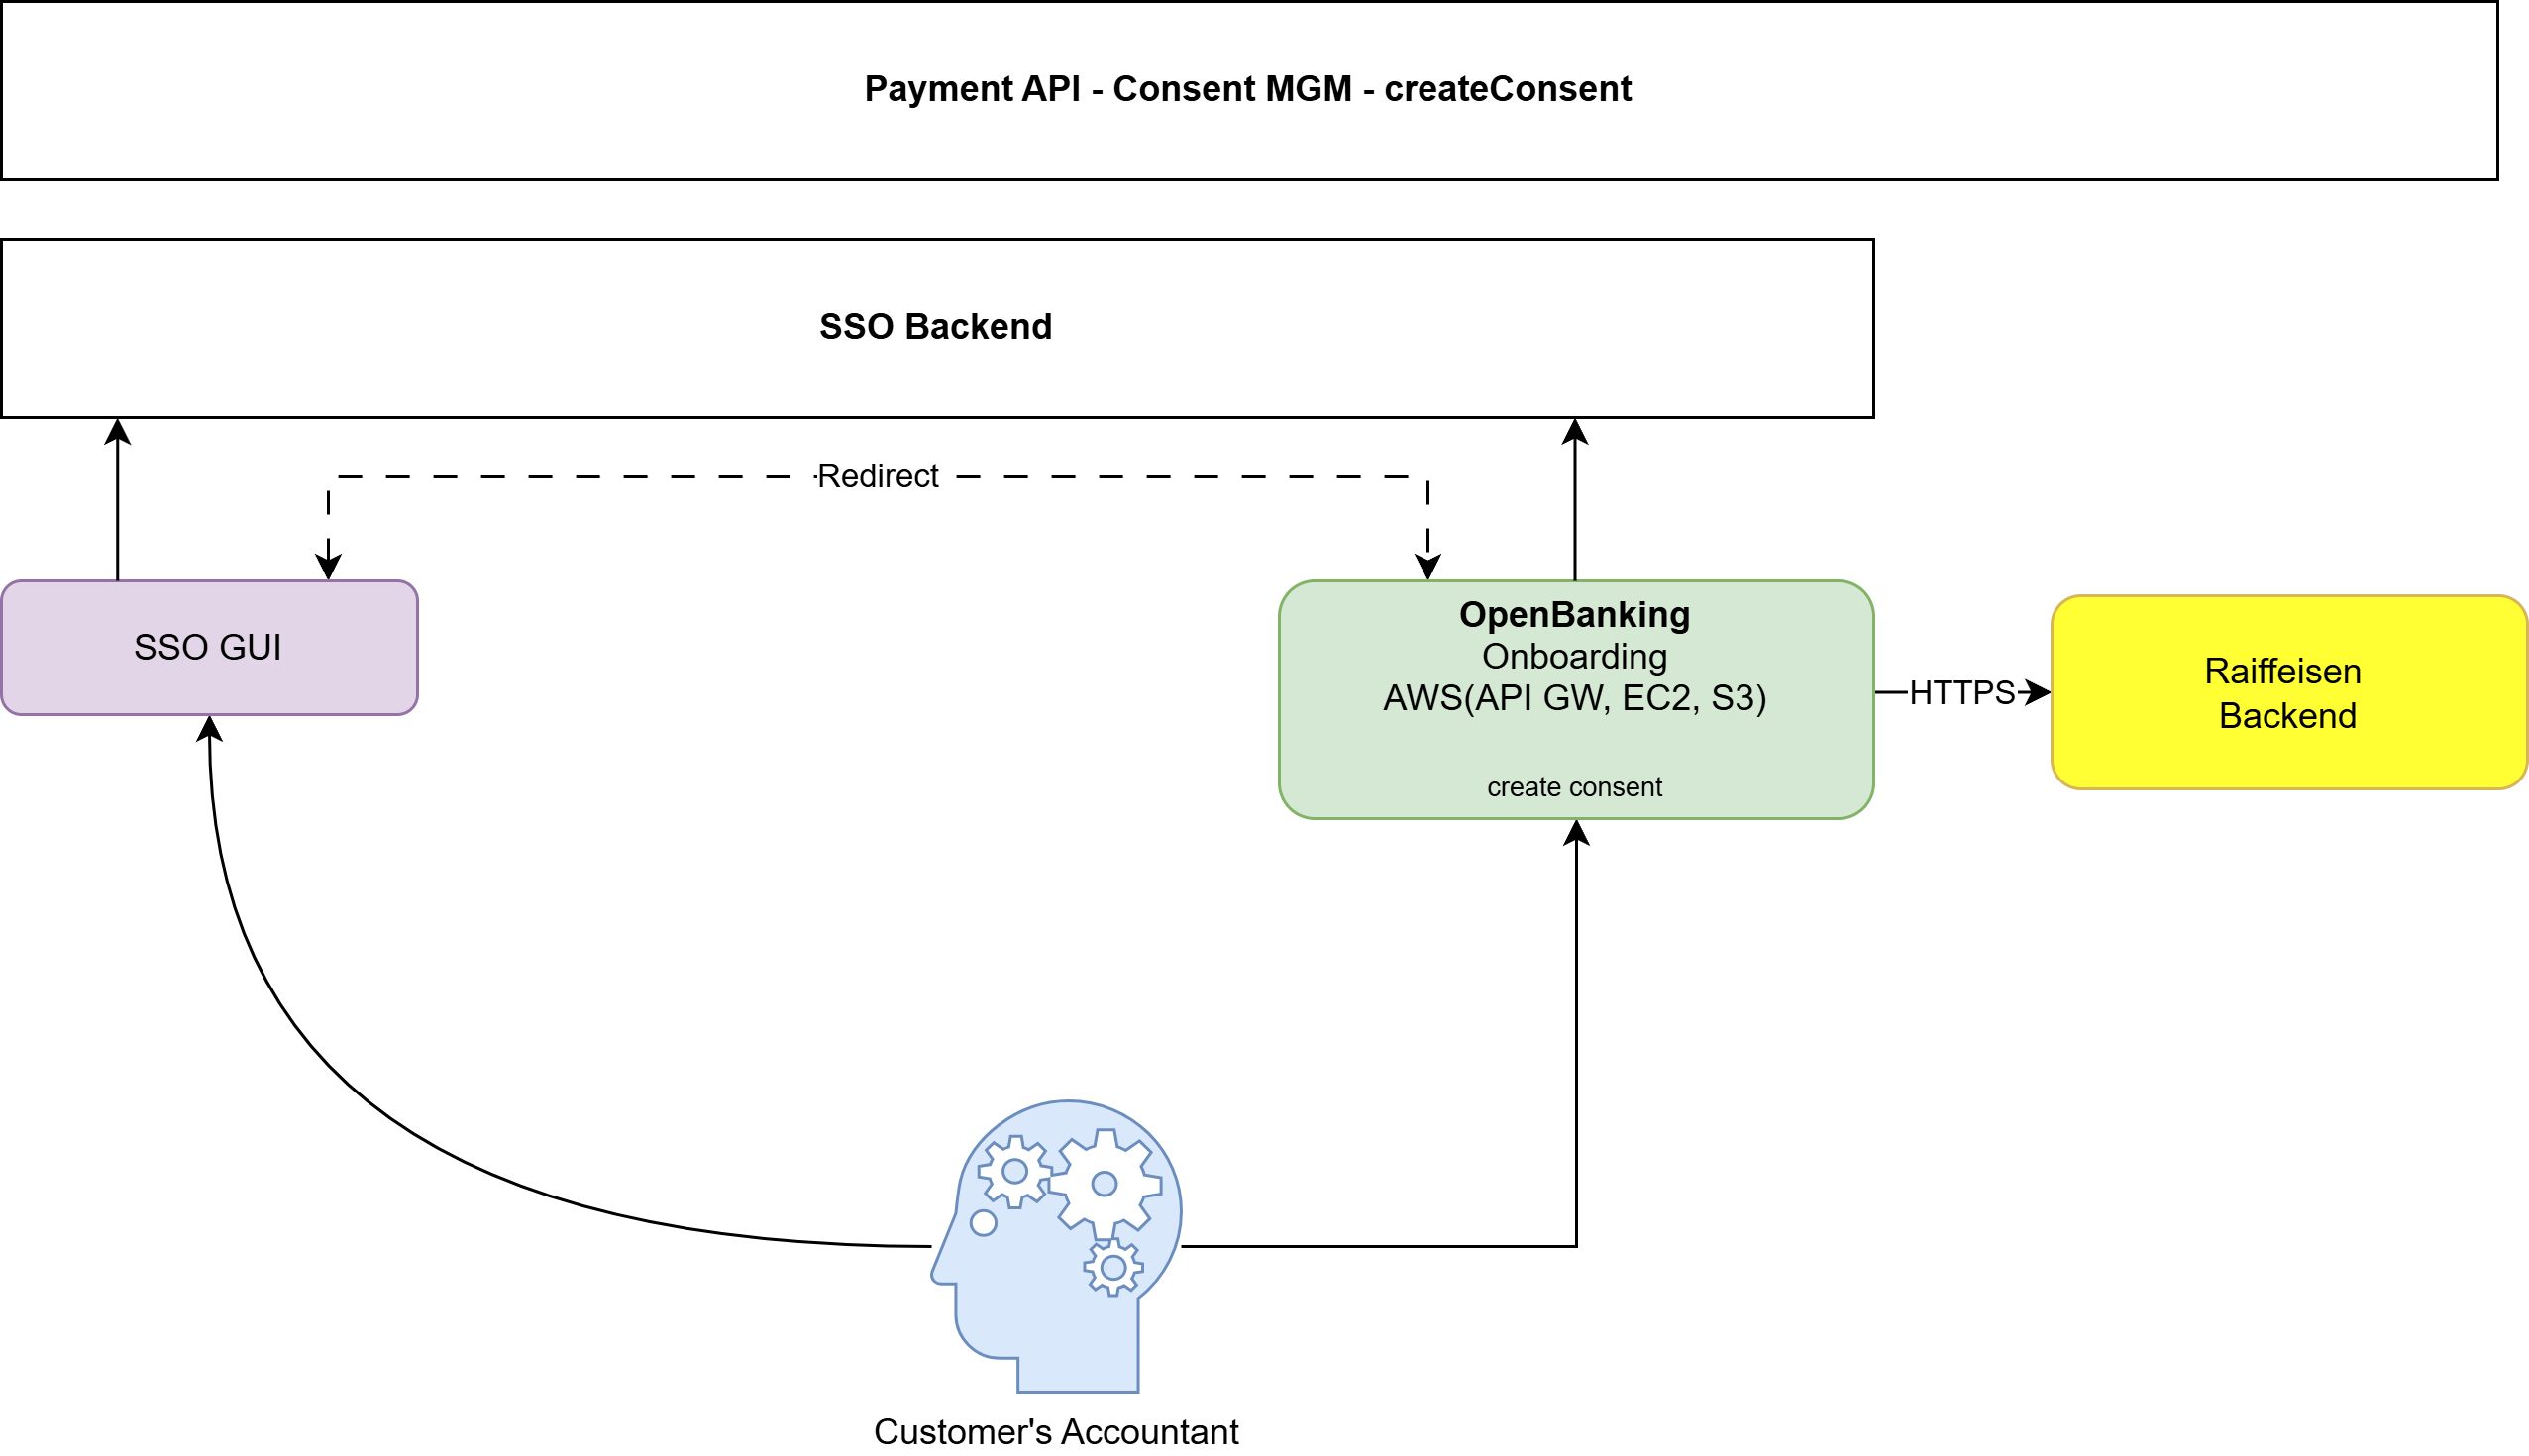
Steps on the RPP portal
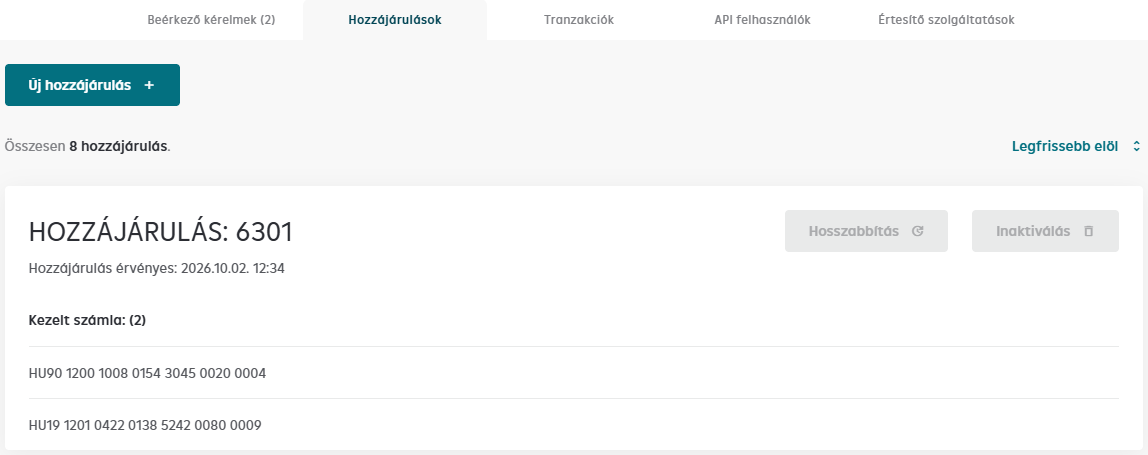
1.a In the case of a user with Approver privileges
By clicking the "New Consent" button under the "Consents" menu item
1.b In the case of a user with System Administrator privileges
Directly under the "Create consent" menu item
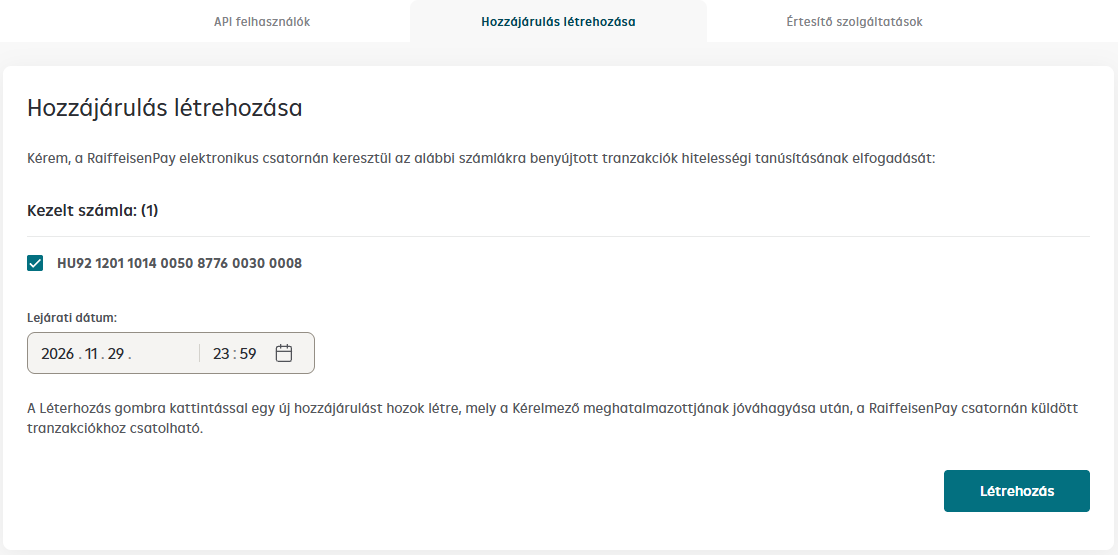
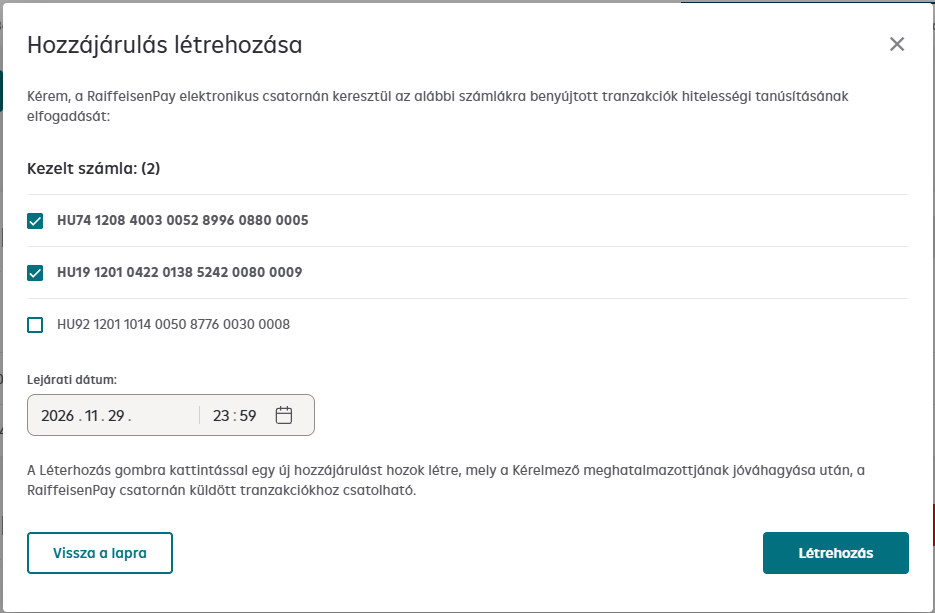
2. Selecting the managed invoice(s) and specifying the expiration date
When creating a Consent, you must specify one or more account numbers and the expiration date of the Consent's validity.
By clicking the "Create" button, the Consent will be created with the status IN_PROGRESS. The creation does not need to be signed, as the created Consent cannot be used in this status yet, it must be approved before use.
The created Consent can be approved by a user with Approver privileges.
Consent Approval (RPP Portal)
Approval process
After successful Consent creation, the user designated in the Consent must accept it on the production Raiffeisen Pay Portal interface before that Consent can be used for initiating payments.
Production RPP portal: https://payportal.raiffeisen.hu

After acceptance, the approved (AUTHORIZED_VALID status) Consents can be referenced to submit payments or query information via the API.
A Consent that has been rejected or revoked on the portal cannot be activated again. In this case, a new Consent must be created.
Steps on the RPP portal
1. Viewing incoming requests
New Consents initiated for the user's ID, as well as Consents created without a prior approver (signer), for which the user has the appropriate permissions, can be found under the "Incoming Requests" menu item.
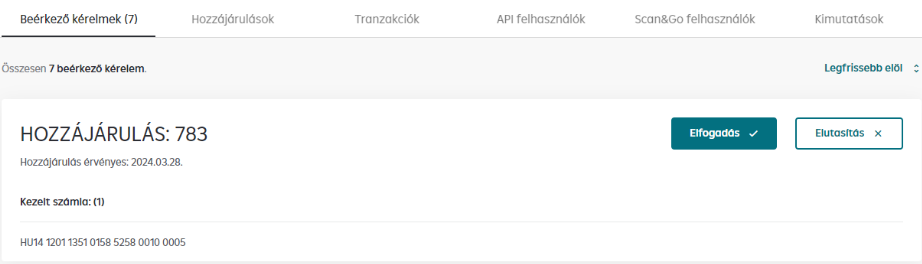
The list of account numbers can also be checked on the Consents (a Consent can contain multiple account numbers).
Check that the Consent contains the correct bank accounts! This is critical because transactions will appear on these accounts.
2. Accepting the Consent
If you accept the consent request, click the "Accept request" button.
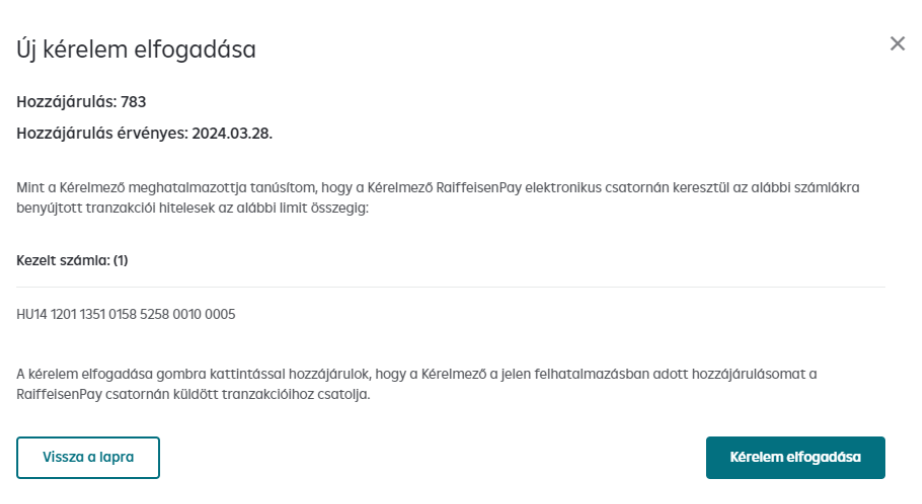
By clicking the accept button, you agree that the Requester may attach the consent given in this authorization to their transactions submitted via the Raiffeisen Pay channel.
3. Signing
The process must be authenticated with password and SMS code.
In the production environment, you receive a real SMS to the registered phone number. The SMS arrives within 30-60 seconds. Details →
After this, the Consent appears among the "Consents".
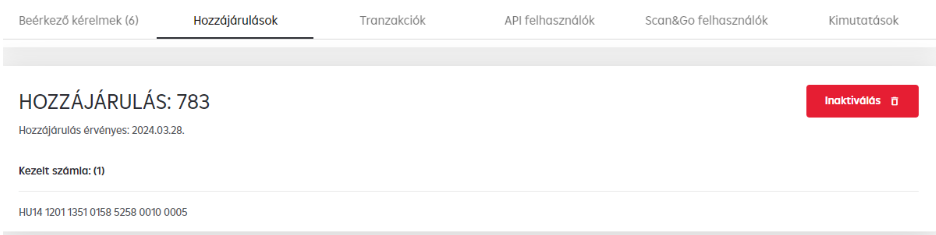
Managing Consents
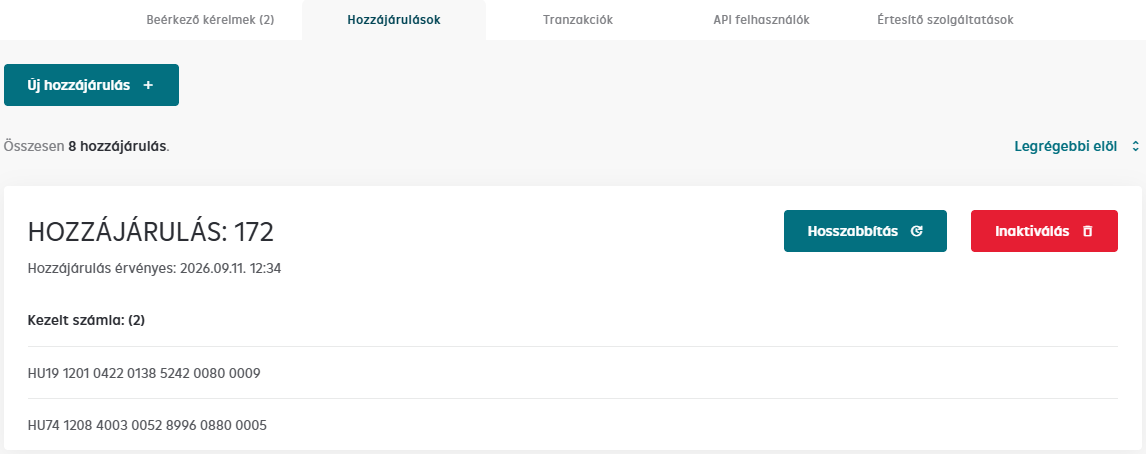
Deactivation
The "Deactivate" button can be used to terminate the Consent's usability.
A deactivated or expired Consent cannot be reactivated – a new one must be created.
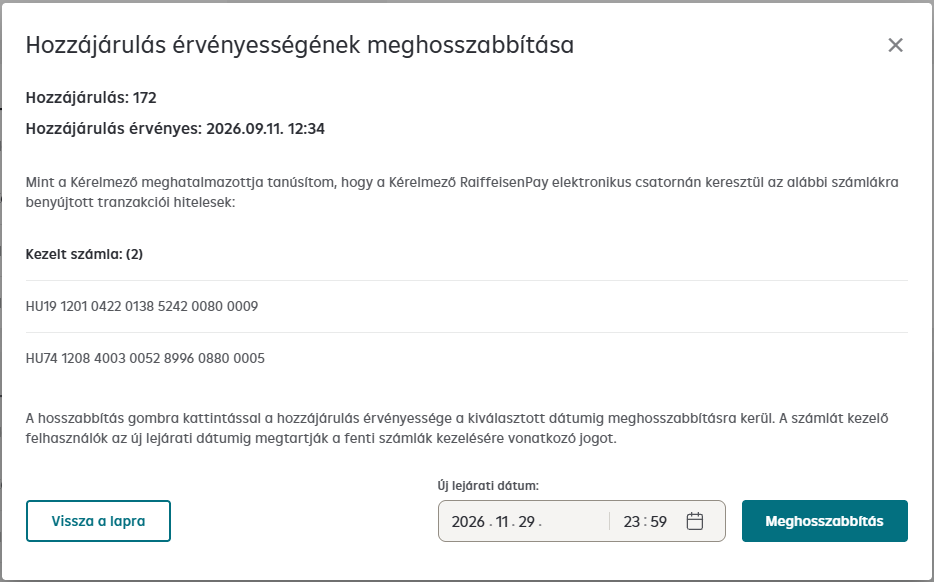
Extension of expiration date
The "Extend" button can be used to extend the validity period of Consent. Extension is only possible if the Consent is still valid, its expiration date is earlier than the maximum 3-month limit that can be specified, and the original approver is the logged-in user.
Viewing Transactions
Transactions sent using the Consent can be viewed under the "Transactions" menu item.
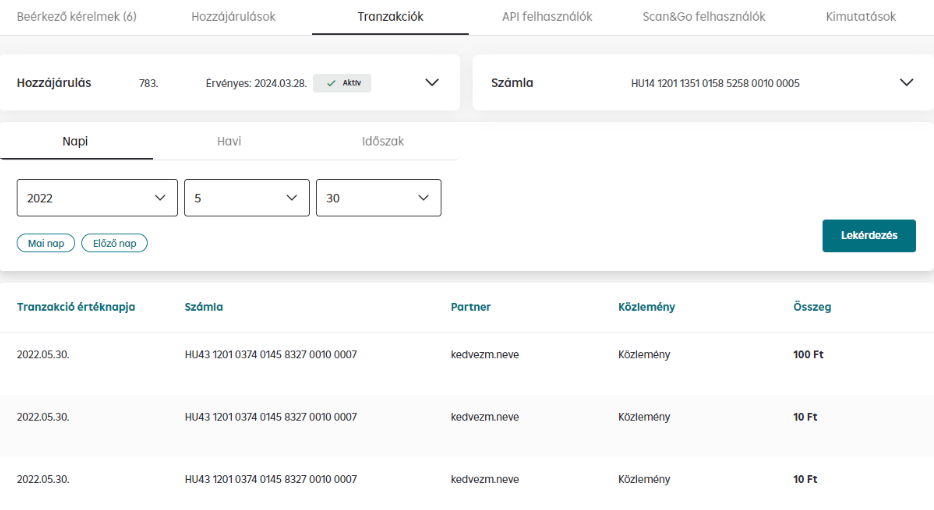
The Consent ID and the time period within which to view the executed transactions can be selected.
Next Step
Now that the Consent is approved, you can make your first production API call.